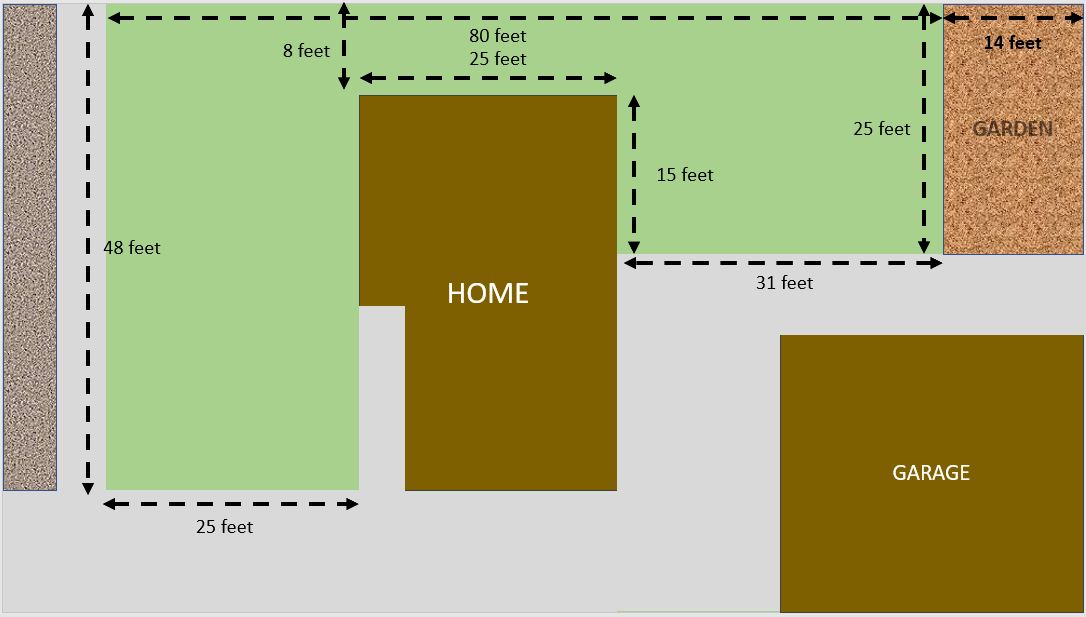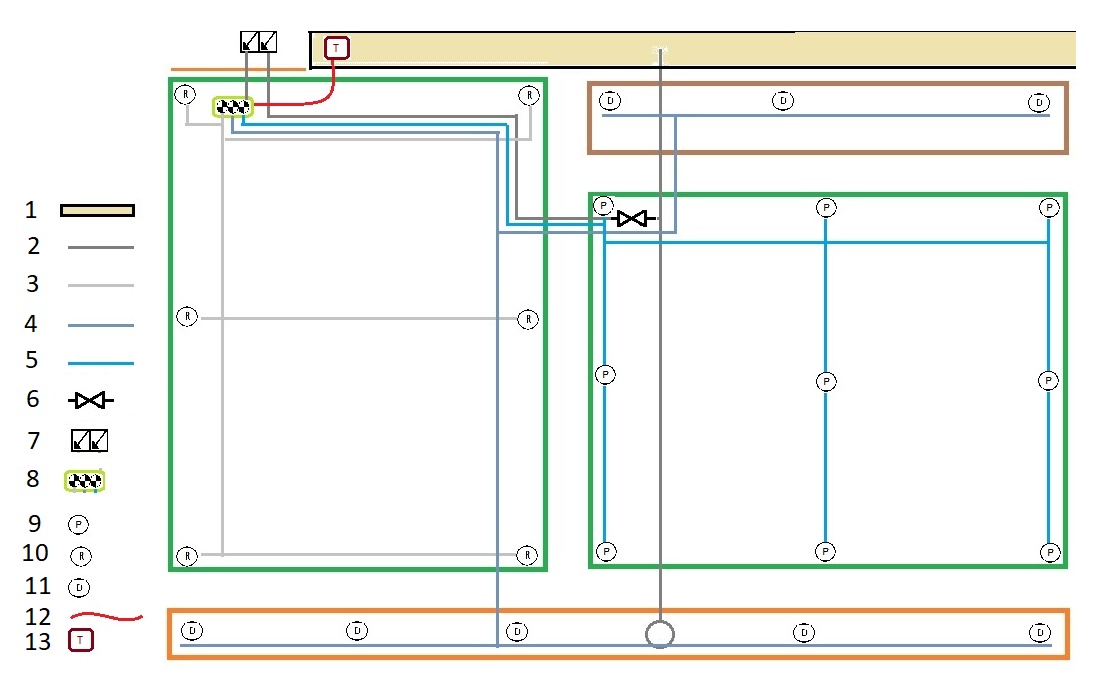
- Residence
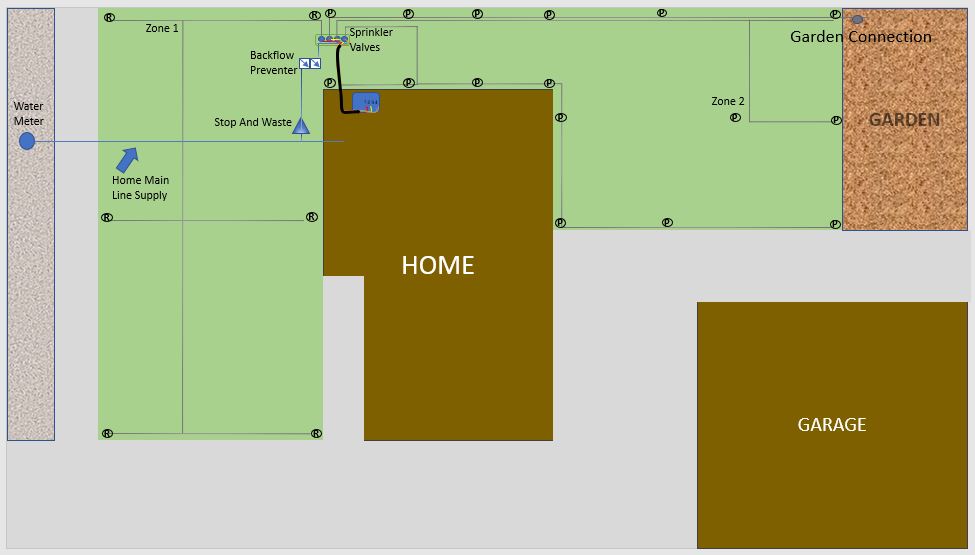
- Main Line
- Zone 1
- Zone 2
- Zone 3
- Stop and Waste
- Backflow
- Automatic Sprinkler Valves
- Pop-Up Spray Heads
- Rotor Sprinkler Heads
- Drip Emitters
- Sprinkler Valve Wiring
- Sprinkler Timer
Sprinkler Head Layout
Sprinkler head layout is perhaps the most important part of your personal installation. If you don’t have a proper layout, you wont have good performance and you will likely waste thousands of gallons of water each season.
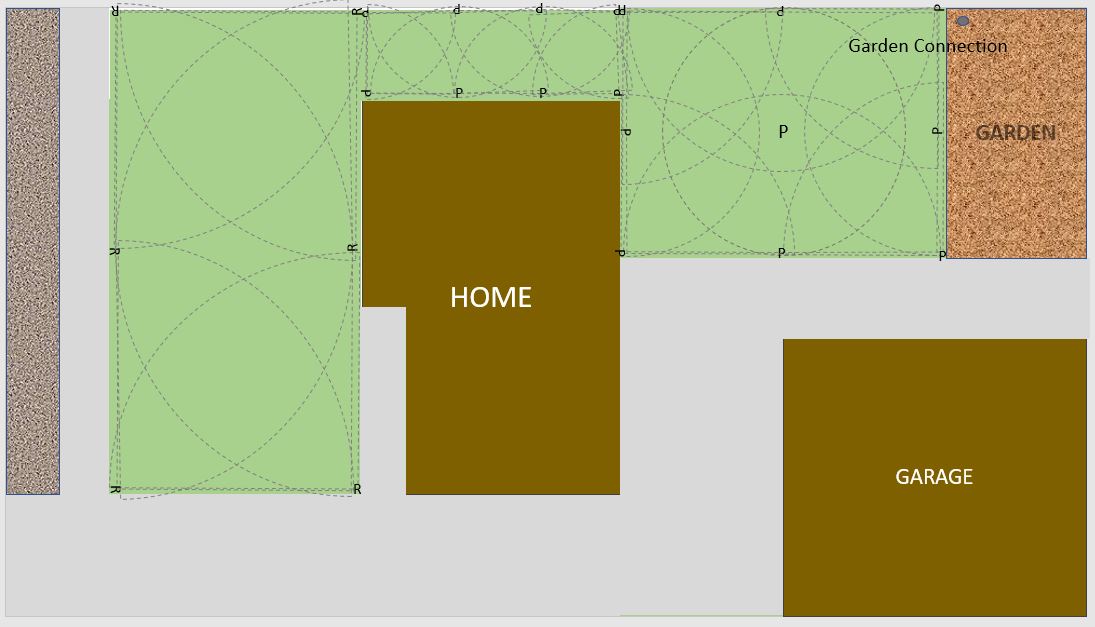
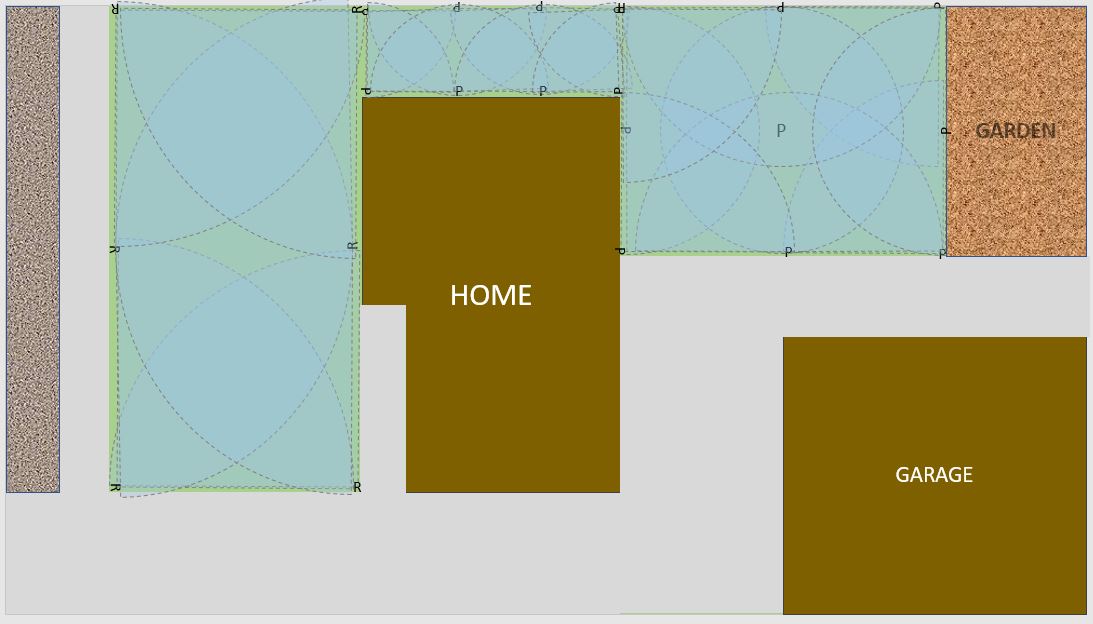
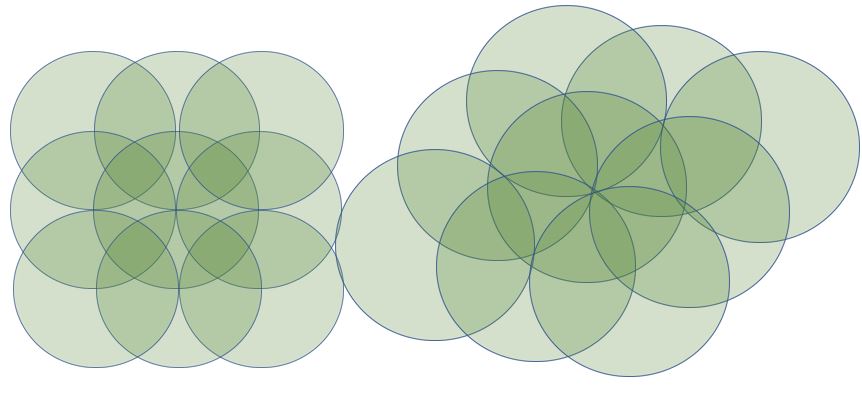
Head To Head Coverage
Head to head coverage is a term you will often hear when having a conversation about sprinklers. The easiest way to describe head to head coverage; Every spot in the irrigated / watered area needs to be covered by at least 2 sprinkler heads, and each head should throw water far enough that it reaches or slightly overlaps the adjacent heads. This is done by considering each sprinkler as a geometric shape. Each sprinkler head is rated with an ARC and Radius, this provides you with the shape you will use to determine coverage. The geometric shapes will all be based around a circle, while your layout will be based around a square or triangle pattern. This is where inefficiency come in to play, because you are trying to fit a round object into a square or triangle pattern.
Layout Examples
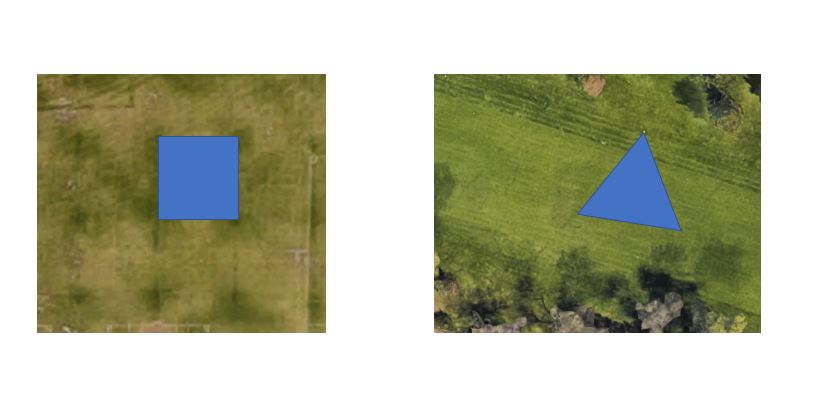

Layout can actually be quite simple, if you don’t over think it. I generally walk around a property with a measuring tape or wheel and place flags according to available products based on distance. Starting with a corner, I measure one one side or edge of the area to be irrigated, and determine what type and size of sprinkler head will fit best. I then repeat this for every side/edge of the irrigated property, until I get an adequate layout to provide good coverage. I then transfer the layout to paper or my computer to see if I have missed anything obvious. I generally pull the property up on google earth or google maps and take a screen shot, then I use a simple drawing app to apply my layout. There is software that can aid you in setting up your layout, but it is expansive and it takes time to learn how to use it. If you have your property measurements, there are some free services offered by all the major sprinkler manufactures, where they will create a custom layout for you, generally free of charge. Check out their websites, or even ask your local sprinkler supplier if they have a similar service. Personally, I have always done my own layouts, because it is quite simple once you understand the concept.
Check out Sprinkler System Calculator